Chemicals are brushed onto water colour paper or another medium of choice, which, will react when exposed to UV light. The brush strokes can be incorporated into the finish of the print to add texture.
The chemicals used are:
- Potassium ferricyanide and Ferric ammonium citrate (green) are mixed with water separately.
- The two solutions are then blended together in equal parts.
- Dissolve 10 grams ferric ammonium citrate in 30 ml distilled water.
- Solution 2: Dissolve 1.5 grams tartaric acid in 30 ml distilled water.
- Solution 3: Dissolve 4 grams silver nitrate in 30 ml distilled water.
- Combine the 3 solutions and stir well. Add enough distilled water to make 100 ml of solution. The solution will keep for several weeks if stored in a cool, dark place.
The original colour image

A negative created from the original file in Photoshop
The negative from a digital file is created as follows:
- Open the chosen jpeg in Photoshop
- Create background copy
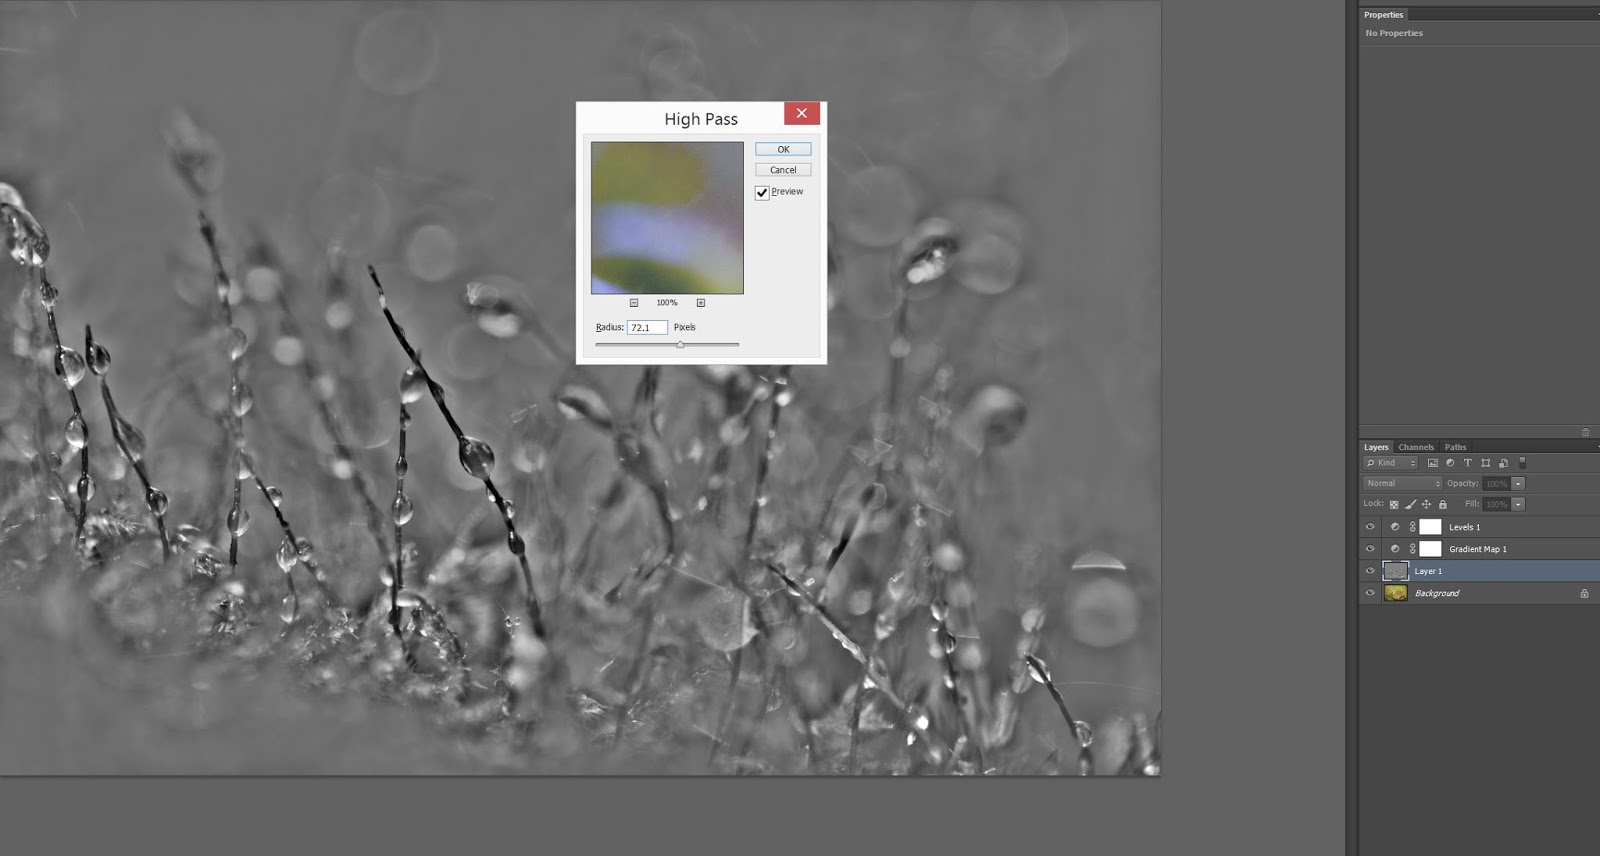
- Gradient map layer used to turn the image black and white
- Add a levels layer to adjust contrast (black and white)
- On the menu bar, select Filter/Other/High Pass then adjust the slider to the desired effect
- Select the blending mode as Overlay
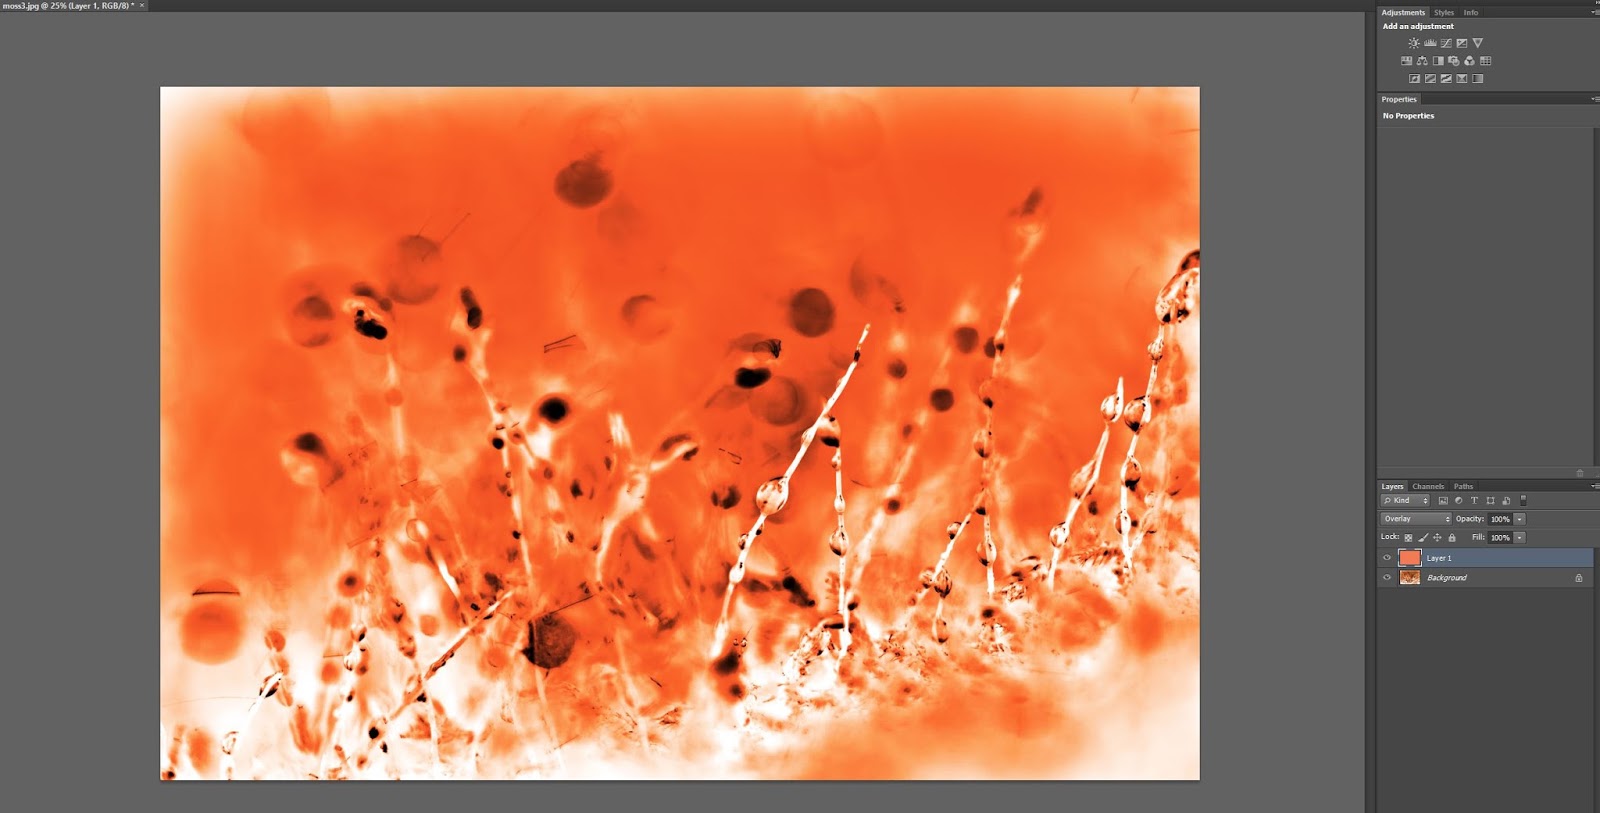
- Create a new layer then enter values in the colour picker menu that will be typical cyanotopes shade
- 47 R, 161 G, 219 B
- Use paint bucket to fill the entire image
- Select the blending mode as Overlay
- On the menu bar, select Image/Adjustments/Invert
- Create a new layer and enter new values in the colour picker to create an orange layer that will help enhance the cyanotype
- 243 R, 110 G, 81 B
- Fill with the paintbucket and select overlay again

The negative can then be printed on transparency film ready to create a cyanotype. To produce a Van Dyke Brown negative, the added orange layer step is omitted.
 |
| “kdstevens” on Lomography (2012) |
The scene in this image already implies age by the strong layer of dust and I feel is further enhanced by the Vandyke brown printing process. I really appreciate the tones created by this method.
 |
| Flowers work well for cyanotypes |
 |
| The glass bottle was an interesting addition |
Two cyanotype photograms created by placing objects onto the treated paper then 'cured' for approx 7.5 minutes with UV light.
 |
| The finished Vandyke brown print result |
 | |
| Negative produced to create a Vandyke brown print |
A Vandyke brown print created from a digital negative.
Evaluation/Reflection
This was an extremely interesting and involving process to learn. I enjoyed evey step of the way including Photoshop, which, I have to admit, I am still not a master of. The paper sensitising was quite a 'messy' process but I feel this added to the feeling of creation and satisfaction at the end. Things did go wrong and I had to experiment with different UV exposure timings to get the right result. At one point my Vandyke brown print actually 'washed off' during the rinsing stage, meaning I needed to repeat the process and try again. The second time attempt was successful as can be seen in the scanned print I added to this blog and being honest, I was quite satisfied with.
My chosen subject seemed to suit the process and the visible tones were quite pleasing. Both printing methods add a feeling of old world to the prints, which, I wanted to portray following research on Cyanotypes by Atkins cited on Wikepedia (2014).
Bibliography
Encyclopaedia Britannica. (2014). Anna Atkins. Available: http://www.britannica.com/topic/1255795/contributors. Last accessed 6th May 2014.
MacGee, S. (2010). Cyanotype history – John Herschel’s invention. Available: http://www.alternativephotography.com/wp/history/cyanotype-history-john-herschels-invention. Last accessed 6th May 2014.
Stevens, K. D. (2012). Beat the blues: Making cyanotypes. Available: http://www.alternativephotography.com/wp/processes/cyanotype/beat-the-blues-making-cyanotypes. Last accessed 7th May 2014.
Stevens, K. D. (2012). Beyond the blues: Vandyke brown printing. Available: http://www.alternativephotography.com/wp/processes/kallitypes/beyond-the-blues-vandyke-brown-printing. Last accessed 7th May 2014.
Wikepedia. (2014). Anna Atkins. Available: http://en.wikipedia.org/wiki/Anna_Atkins. Last accessed 6th May 2014.


No comments:
Post a Comment