Opening a file and using non-destructive editing in Photoshop using the Layers pallet and Curves tool
The image below is the one I have chosen to edit in Photoshop which was opened by selecting file and then open in Photoshop (CMD + O is the shortcut). I then chose the file that contained the following image and clicked 'open'. On a MAC the file can be simply dragged to the Photoshop logo on the dock. I chose this image to work with as it was a cloudy day and the sky looks over exposed and the foreground a little dull.

f/9 1/60s ISO-100 55mm
First point to note is that we should avoid making adjustments directly to an an image that we have opened using the menu bar at the top of the page in Photoshop - this is classed as destructive editing. Non-destructive editing is achieved by using the layers pallet on the right hand side of the window in Photoshop or opening the layers pallet by using 'CMD and L' if it is not already open. The next step is to create a duplicate background layer by selecting the keys 'CMD and J'. This ensures the editing will take place on a layer and not on the original background making it very easy to backtrack if a mistake is made during editing.
Screen shots on a Mac are created by using the CMD, SHIFT and 3 keys

Screen shot showing the layers pallet on the right hand side.
Levels and curves are considered two of Photoshop's most important image editing tools. Levels has three adjustment points whilst Curves has up to 14 adjustment points and is very useful for fine tuning the contrast in greater detail.
Using Curves to manipulate the exposure in my image.

Screen shot showing the curves window open.
The Final Result

Non-Destructive Editing in Photoshop Using Levels
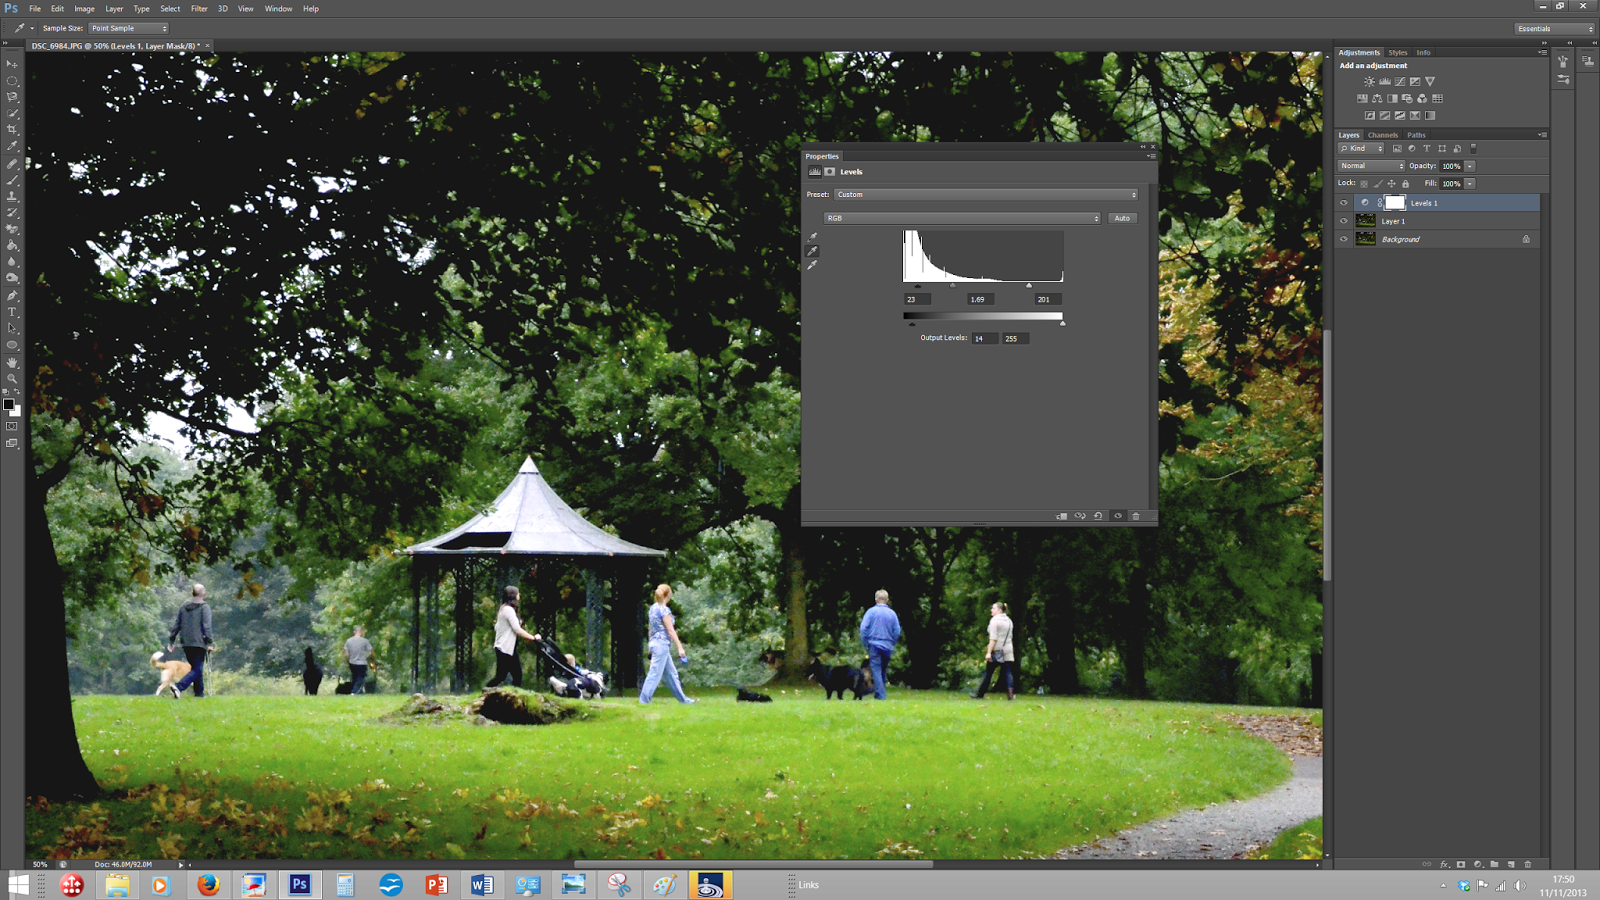
The image below was taken in a dark area with low evening light. I liked the composition of dog walkers within the frame so will try to lighten the area of activity to improve the overall image.

In the levels window, the histogram is showing there is very little at the white end of the graph whilst there is too much black at the opposite end of the graph. Holding down the 'Alt' key while moving the black slider turns the screen white with dark areas, which lets me adjust the darker areas in a more controlled manner. The same is repeated with the white slider, only this time the screen turns black and as the highlighted areas start to appear, these areas will appear 'burnt out' so it is important to control this aspect as well.

To alter the colour balance of the image, I have selected the centre eye dropper, this is mid grey. I have then chosen the grey path in my image to act as neutral grey. Clicking on the area changed to colour balance to a satisfactory result.
The Final Result

Re-sizing an image for use on the web with Copywrite notes
In order to prepare my images for uploading to the web, resizing and
coprwriting is necessary. This enables the uploaded image to display
correctly on most screens when being viewed. The copywriting is to help
protect my ownership of the image.
The
image resizing is achieved by selecting the keys 'alt, ctrl and I'
together to allow the 'Image size' dialogue window to be visible. A
resolution of 72 pixels/inch can then be typed in the appropriate box
and change the width to 7 inches in the appropriate drop down box.
Saving the file as a JPEG is the preferred choice when resizing an image
for the web as can be seen in the screen shot below.
To add a
copywrite to the image, first select the text icon on the left hand side
tools pallet, next place the cursor on the image where you would like
the copywrite to appear and then select the keys 'Alt and G'. A name or
company can then be typed next to the copywrite sign.
Original Image

f/9 1/250s ISO-100 13mm
Screen shot of saving the resized image in JPEG format

Resized and Copywrited for use on the web

When resizing, copywriting and saving multiple images for use on the web (especially for blogger), we can create an 'Action' in Photoshop to save a lot of time. This is achieved by pressing the keys 'Alt and F9' to display the Actions menu. A new Action needs to created by selecting the correct icon at the bottom of the Actions window, giving it a suitable title and then selecting the red button to begin recording all of the required actions. Repeat the steps already explained on 'Re-sizing an image for use on the web and Copywriting' then select the white square at the bottom of the actions window which will effectively end the action recording session.
Recording the processes to resize and copywrite an image

Screen shot showing an 'Action' recording session being applied

Zooming the image in once the 'Action' has been applied prior to saving

Screen shots on a PC are created by using the method outlined in this screen shot
.png)
No comments:
Post a Comment